kitchen & bath cabinet painting
kitchen & bath cabinet painting
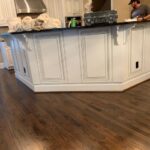
Painting kitchen and bathroom cabinets can be a great way to update the look of your home without a complete renovation. It’s a cost-effective and relatively simple DIY project that can make a significant difference in the appearance of your kitchen or bathroom. Here’s a step-by-step guide to help you get started:
Materials you’ll need:
Screwdriver
Sandpaper (medium and fine grit)
Tack cloth or a damp cloth
Painter’s tape
Primer
Paint (choose a paint designed for cabinets or furniture)
Paintbrushes and/or foam rollers
Optional: drop cloths to protect surrounding areas from paint splatter
Step-by-step process:
Preparation: Empty the cabinets and remove all hardware (handles, knobs, etc.). If possible, disassemble the cabinets by removing the doors and shelves. This will make the painting process much easier and ensure a smoother finish.
Cleaning: Thoroughly clean the surfaces of the cabinets to remove any dirt, grease, or grime that may interfere with paint adhesion. Use a mild detergent or a mixture of water and vinegar. Rinse with clean water and allow them to dry completely.
Sanding: Lightly sand the cabinet surfaces, including doors and drawer fronts. Sanding helps to create a slightly rough surface that improves paint adhesion. Start with medium-grit sandpaper and then switch to fine-grit sandpaper for a smooth finish. After sanding, wipe away any dust with a tack cloth or a damp cloth.
Priming: Apply a coat of primer to the cabinet surfaces. Primer helps the paint adhere better and ensures that the previous color or wood grain doesn’t bleed through the new paint. Use a high-quality primer suitable for your cabinet material. Let the primer dry according to the manufacturer’s instructions.
Painting: Once the primer is dry, you can start painting. Use a paint specifically formulated for cabinets or furniture for the best results. You can use a brush for smaller areas and a foam roller for larger flat surfaces to achieve a smooth finish. Apply thin and even coats, and allow each coat to dry before applying the next one. Two to three coats of paint are usually sufficient for a solid finish.
Drying and Reassembly: Allow the cabinets to dry completely. Follow the paint manufacturer’s recommended drying time. Once the paint is dry to the touch, reattach the cabinet doors, shelves, and hardware.
Optional: Sealant or Topcoat: If you want extra protection for your painted cabinets, consider applying a clear polyurethane or polycrylic topcoat. This will add durability and make the cabinets easier to clean.
Final Touches: Once everything is assembled and dried, remove any painter’s tape, and do any necessary touch-ups if you notice any uneven spots or imperfections.
Keep in mind that cabinet painting requires patience and attention to detail. Take your time and ensure each coat of paint is dry before proceeding with the next step. When done correctly, your kitchen and bathroom cabinets can look fresh and new, giving your space a fantastic update.